
It's hard not to want to chomp into a dozen or more small chicken wings; with soft meat inside covered by a hard crusty skin that's soaked in hot sauce. The only setback are these things are killers in the calories department and the amount of fats present in the skin and dripping grease inside the meat is too much to bear. With the NFL playoffs underway there's even more so reason to want to tear into some wings, so I got to thinking if there could be healthier alternative to put some spice in your mouth and fill your belly without taking years off the lifespan.
The great thing about broccoli is that its very inexpensive, so if the "boys" are coming over and you gotta make a tray of wings, or even if you have to cater out - you're looking at anywhere from a sixty to a hundred dollar hit in the wallet, to be conservative. To feed the same amount of people using the broccoli, its only at a fraction of the cost, in the neighborhood of ten bucks. Most places serve buffalo wings with celery, carrots, and blue cheese(which is gross), to provide the illusion that somehow two sticks of celery is going to magically erase all the fat and calories from the wings. It's ridiculous, the way some people thing drinking a diet soda with a double-cheeseburger is going to lessen the fact that a double-cheeseburger had just been consumed. There are no shortcuts around buffalo wings, so the only solution is hard work through buffalo broccoli. The way a good singer needs instruments and accompaniment to make good music, broccoli needs some friends to make the dish more lively. In this case its going to be onions and fresh garlic cloves. In addition, you need sweet chili sauce(like the Chinese places use), salt, black pepper, and of course the hot sauce which gives that zingy "buffalo" taste.
Speaking of Chinese, its best to cook this in a wok, if available, if not a flat frying pan will certainly do the job as well. Stir-frying broccoli isn't exactly the best way to get the most vitamins and nutrients out of them, compared to steaming for example, but steaming is a far cry from the absence of chicken meat, so stir-fry is the most reasonable middle ground. Even with frying it up broccoli contains essential cholesterol-lowering agents as well the fiber to help with the digestive tract. Also broccoli has been linked to reducing inflammation inside the body, which lessens cell damage, and naturally boosts out body's detoxification system that comes into play if beer is being consumed while watching the game. It's probably quite safe to say that traditional buffalo wings do the exact opposite of all that. Plus, if you're eating a wing with a cut on your finger or on your mouth, the burning sensation afterwards is sometimes quite painful. Eating food should be enjoyable, not painstaking. The only pain involved with buffalo broccoli is if someone accidentally cuts their finger while chopping up the vegetables. Only the bushy top part of the entire broccoli stem is needed, the rest of the trunk could be discarded. Some people use those leftover trunks for soup stock, but that's a different recipe for a different time.
Once the broccoli, onions, and garlic are all chopped, sliced, and ready to go; heat up the wok and place a few small drips of oil and a few good tablespoons of the sweet chili sauce. Leo was watching to make sure I put in the right amount. The sauce contains the pepper flakes which will help provide some punch along with the hot sauce later on. When the sauce and oil start popping from the heat, then its time to dump in the onions and garlic. At this point do not put in the broccoli quite yet - only the onions and garlic! Putting in the broccoli too early will cause them to get mushy as well as it robs the body of those essential nutrients discussed earlier with each extra minute its in that wok(or pan). The garlic on the other hand needs to liquefy as much as possible and mix in with the chili sauce, while the onions have to cook down and act as a respectable co-pilot to the broccoli. After about eight minutes when the onions are browned and most of the garlic slices have disappeared, then its the proper time to bring the broccoli into the equation. Ease the broccoli in by lowering the fire to the minimum to prevent burning it. Sprinkle in some salt and black pepper to add flavor, and mix the broccoli around with the chili sauce while introducing them to their new friends - onions and garlic. Give it a good five minutes of mixing it around and letting it cook a little before adding that final ingredient. The broccoli needs to heat up and open those pores on the surface.
Some other "chefs" like to put a crust on their "buffalo broccoli", which is another example of ridiculousness. The whole point of buffalo broccoli is to avoid the "skins", "crusts", "layers", etc. In that case might as well deep-fry them in batter and serve it at the local state fair. The much more sensible, and healthier, approach is simply pouring the hot sauce all over the broccoli and letting it cook in with all the other flavors. In fact, at the flower head part of the broccoli piece the hot sauce will stick along the bushy surface and provide the same spicy kick a crusted-head would contain, which again, is another reason why the crust is not necessary and is nothing more than an empty excuse to add calories. After a good sauce dousing, let the broccoli cook for another five to seven minutes, and keep stirring it until the reddish hot sauce isn't visible anymore. When those next seven minutes are up, or if you notice the broccoli getting too mushy or burnt, then its time to turn off the fire. The smooth curvy texture of the wok will allow you to plate the dish without leaving that valuable sauce behind. The next thing you know everyone will be asking to come over to your place for the big game.
And not one cut finger or lip will be burned.....


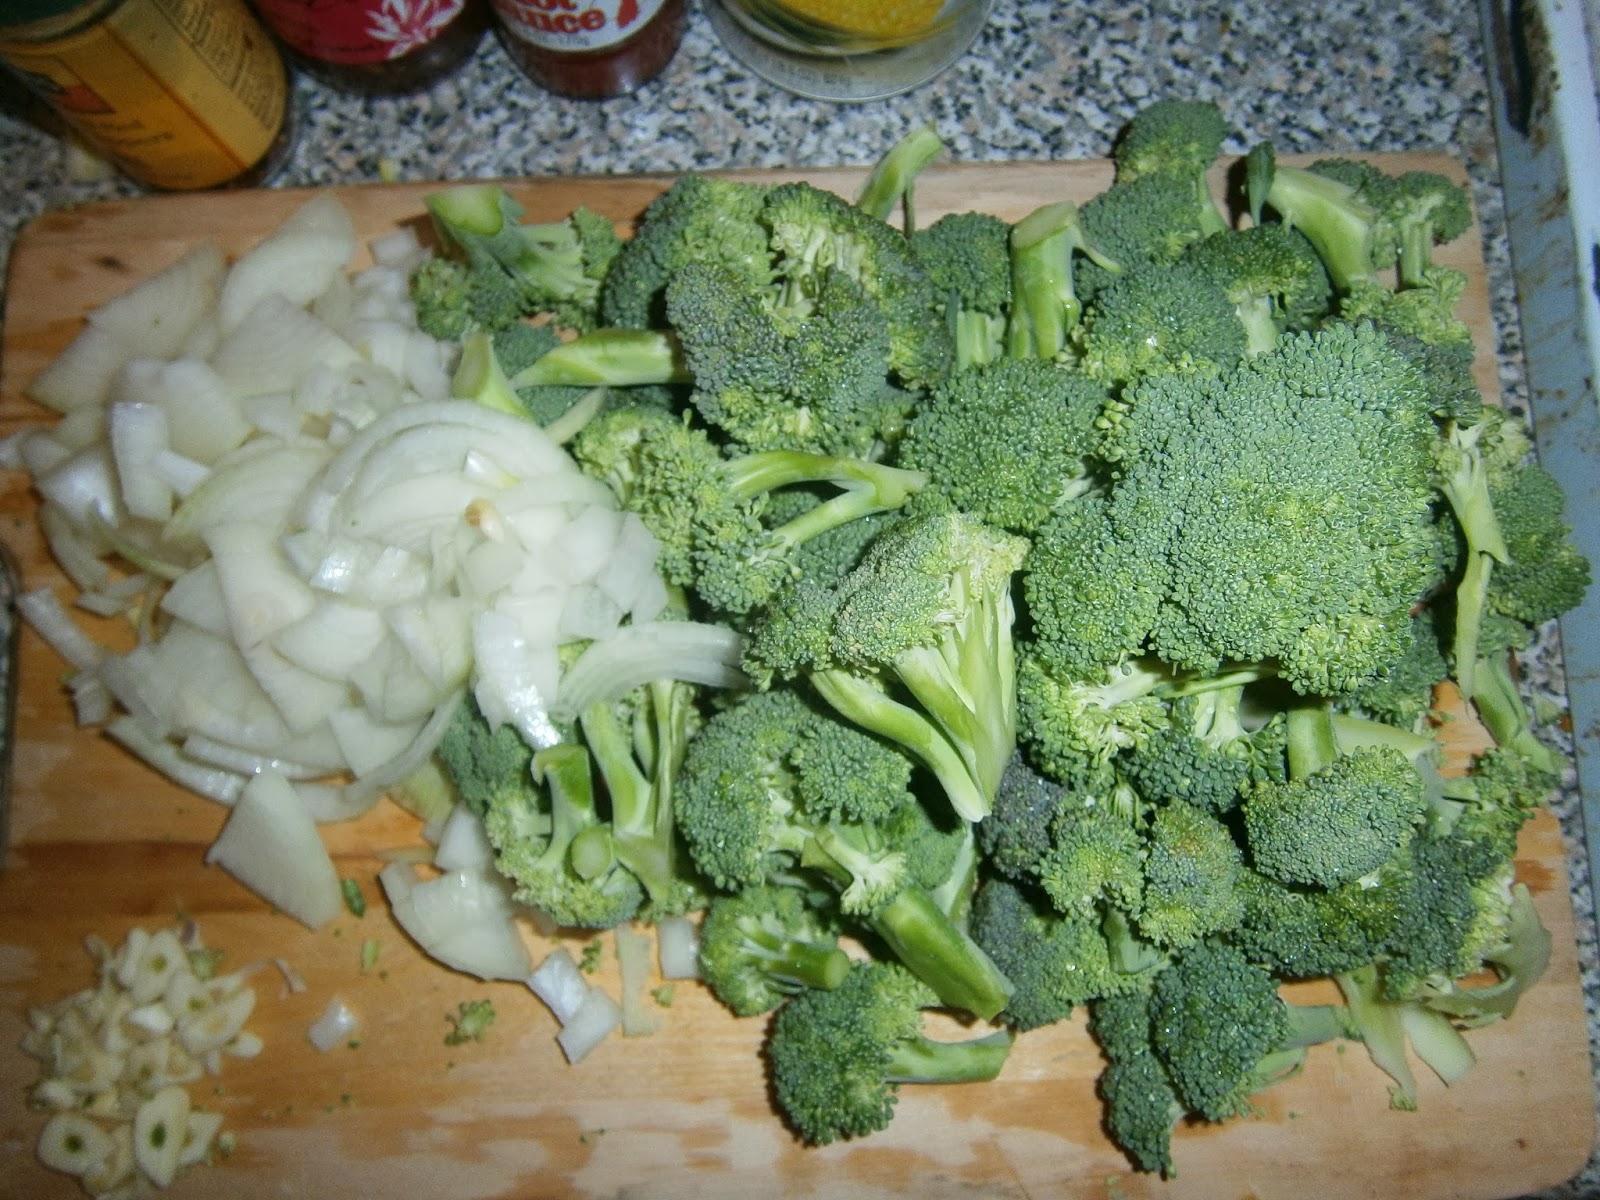


The great thing about broccoli is that its very inexpensive, so if the "boys" are coming over and you gotta make a tray of wings, or even if you have to cater out - you're looking at anywhere from a sixty to a hundred dollar hit in the wallet, to be conservative. To feed the same amount of people using the broccoli, its only at a fraction of the cost, in the neighborhood of ten bucks. Most places serve buffalo wings with celery, carrots, and blue cheese(which is gross), to provide the illusion that somehow two sticks of celery is going to magically erase all the fat and calories from the wings. It's ridiculous, the way some people thing drinking a diet soda with a double-cheeseburger is going to lessen the fact that a double-cheeseburger had just been consumed. There are no shortcuts around buffalo wings, so the only solution is hard work through buffalo broccoli. The way a good singer needs instruments and accompaniment to make good music, broccoli needs some friends to make the dish more lively. In this case its going to be onions and fresh garlic cloves. In addition, you need sweet chili sauce(like the Chinese places use), salt, black pepper, and of course the hot sauce which gives that zingy "buffalo" taste.
Speaking of Chinese, its best to cook this in a wok, if available, if not a flat frying pan will certainly do the job as well. Stir-frying broccoli isn't exactly the best way to get the most vitamins and nutrients out of them, compared to steaming for example, but steaming is a far cry from the absence of chicken meat, so stir-fry is the most reasonable middle ground. Even with frying it up broccoli contains essential cholesterol-lowering agents as well the fiber to help with the digestive tract. Also broccoli has been linked to reducing inflammation inside the body, which lessens cell damage, and naturally boosts out body's detoxification system that comes into play if beer is being consumed while watching the game. It's probably quite safe to say that traditional buffalo wings do the exact opposite of all that. Plus, if you're eating a wing with a cut on your finger or on your mouth, the burning sensation afterwards is sometimes quite painful. Eating food should be enjoyable, not painstaking. The only pain involved with buffalo broccoli is if someone accidentally cuts their finger while chopping up the vegetables. Only the bushy top part of the entire broccoli stem is needed, the rest of the trunk could be discarded. Some people use those leftover trunks for soup stock, but that's a different recipe for a different time.
Once the broccoli, onions, and garlic are all chopped, sliced, and ready to go; heat up the wok and place a few small drips of oil and a few good tablespoons of the sweet chili sauce. Leo was watching to make sure I put in the right amount. The sauce contains the pepper flakes which will help provide some punch along with the hot sauce later on. When the sauce and oil start popping from the heat, then its time to dump in the onions and garlic. At this point do not put in the broccoli quite yet - only the onions and garlic! Putting in the broccoli too early will cause them to get mushy as well as it robs the body of those essential nutrients discussed earlier with each extra minute its in that wok(or pan). The garlic on the other hand needs to liquefy as much as possible and mix in with the chili sauce, while the onions have to cook down and act as a respectable co-pilot to the broccoli. After about eight minutes when the onions are browned and most of the garlic slices have disappeared, then its the proper time to bring the broccoli into the equation. Ease the broccoli in by lowering the fire to the minimum to prevent burning it. Sprinkle in some salt and black pepper to add flavor, and mix the broccoli around with the chili sauce while introducing them to their new friends - onions and garlic. Give it a good five minutes of mixing it around and letting it cook a little before adding that final ingredient. The broccoli needs to heat up and open those pores on the surface.
Some other "chefs" like to put a crust on their "buffalo broccoli", which is another example of ridiculousness. The whole point of buffalo broccoli is to avoid the "skins", "crusts", "layers", etc. In that case might as well deep-fry them in batter and serve it at the local state fair. The much more sensible, and healthier, approach is simply pouring the hot sauce all over the broccoli and letting it cook in with all the other flavors. In fact, at the flower head part of the broccoli piece the hot sauce will stick along the bushy surface and provide the same spicy kick a crusted-head would contain, which again, is another reason why the crust is not necessary and is nothing more than an empty excuse to add calories. After a good sauce dousing, let the broccoli cook for another five to seven minutes, and keep stirring it until the reddish hot sauce isn't visible anymore. When those next seven minutes are up, or if you notice the broccoli getting too mushy or burnt, then its time to turn off the fire. The smooth curvy texture of the wok will allow you to plate the dish without leaving that valuable sauce behind. The next thing you know everyone will be asking to come over to your place for the big game.
And not one cut finger or lip will be burned.....


